
LMS2 Diner: From Idea to In-Game Asset
When players experience a scene or location in a video game, you’ll likely see many elements that help make the world feel alive and add personality to a game environment. Within Lawn Mowing Simulator 2 we really wanted to incorporate a diner within our game. However, building this diner involves planning, modelling, optimisation and implementation into the game engine.
Here’s a behind the scenes look at how our diner within LMS2 was created.
Gathering References and Planning the Diner
The starting point before we create many assets within a game, is to collect reference images from real-world locations and create a mood board style folder. This doesn’t just mean picking images we like – we choose ones that match the game’s established style (such as level of realism, colour palette, shapes and proportions etc). This style guide helps ensure that every asset that is created fits within the game world.
After gathering references that match the style guide, the next step is to use those references and start sketching variations of the asset – in this case our diner. The helps decide what works best within the game and once a few options have been explored, we then refine the strongest idea into a clearer concept art piece. As you can see from our concept art image below for the diner, this includes more detail and colour so that it can be used as a guide for building the 3D model.
Blockout: Building basic shape
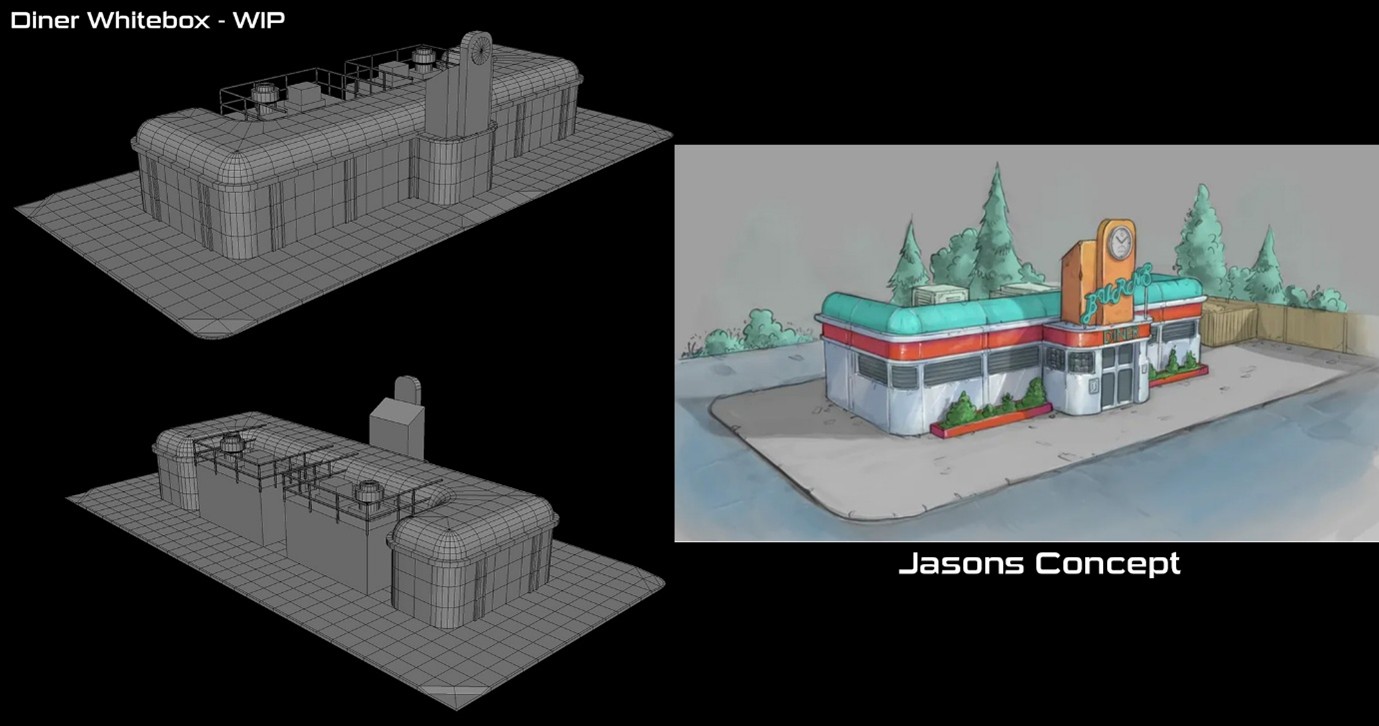
Once the concept art has been approved, the next step is to create the blockout image. At this stage everything is simple and the artist creates a non-detailed 3D version of the diner using basic geometric shapes. At this stage, the diner will have no textures or any small details added. The goal for this is to test that the scale and proportions are right inside the engine.
See image below on how this is moved on from the initial concept art level:
Modelling diner details
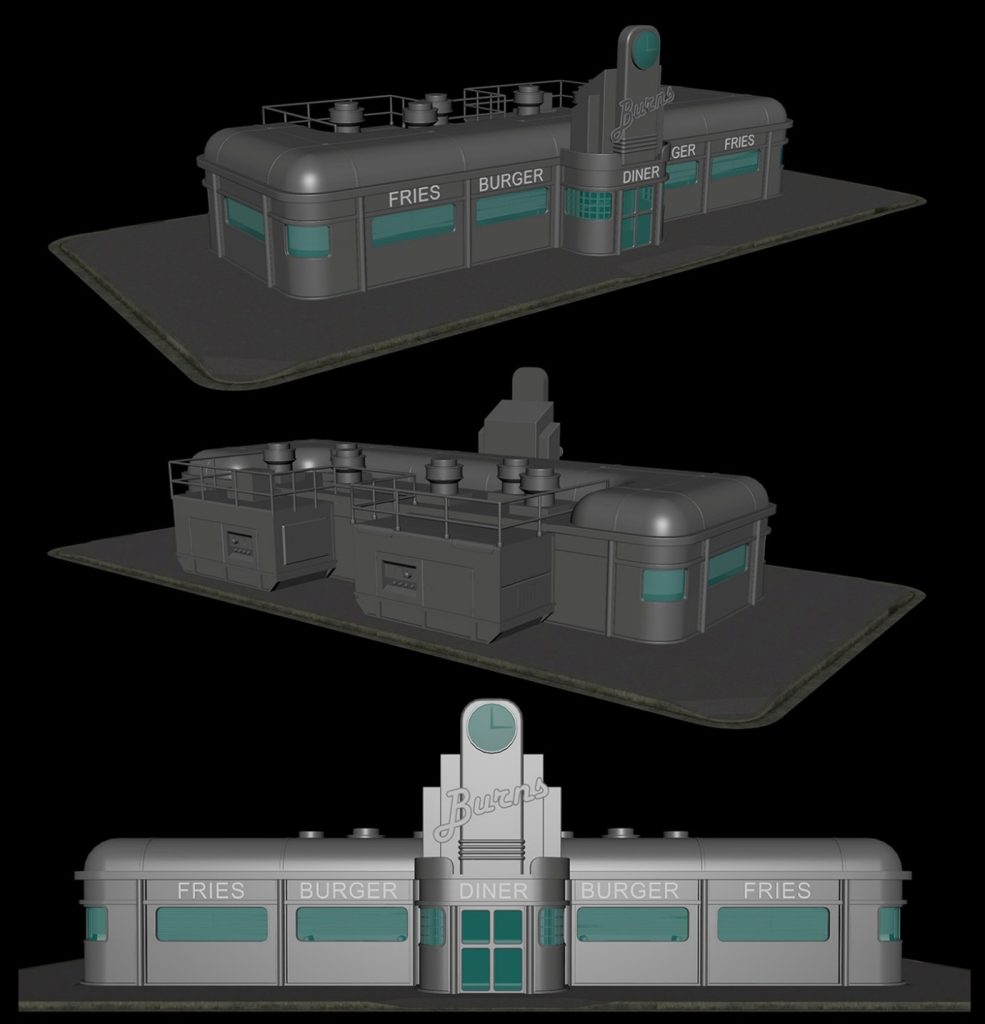
The next step, once the team are happy with the diner’s basic shape is to move onto modelling the details. This includes adding details such as windows, doors, roof, signage and other exterior design.
You can see from the image below how this starts to take shape:
UV Mapping
The next step in the diner creation process is UV mapping. This process allows textures to be applied correctly and makes sure they don’t get distorted or stretched. These are carried out on difference sections such as the walls, roof, glass etc. Then each module is unwrapped separately, and seams are placed along the natural edges and maintain a consistent texture.
Adding Textures & Materials
At this stage, other details of the diner are created. Consideration is given to the base colours and how surfaces will look. This includes things like shadow details, how shiny or matte something will appear. Other details such as wear and tear, dirt and the signs are added. For example, if you look carefully, our diner has less shine to the corners of the chrome surfaces.
Optimising
Once the modelling and texturing are completed, the next phase is optimisation. This refers to the process of reducing the diner’s 3D model file size, polygon count and texture compression to improve performance in the game engine. The complexity of this is balancing the process of lowering the polygon counts where possible without significantly sacrificing the visual quality.
Importing into engine
The final stage is to import the diner into the game engine. Once this is done and the team are happy that it has been optimised effectively, then attention falls to embedding this into the scene.
Artists will then add further details within the engine such as:
- Collision adding – an invisible collider placed over the diner’s model which defines its boundaries to ensure objects can’t go through it etc.
- Lighting adjustments – Care is taken to ensure the lighting on the diner is adjusted to fit the environment and helps add depth to the scene.
- Shadow settings – Consideration is paid to making shadows look natural and allowing for contrast between dark and bright areas etc.
Once at this point does the diner truly become part of the playable environment.
Final thoughts
A diner in a video game may seem like a simple object, but creating one requires a combination of artistic design, technical knowledge and performance optimisation.
From a rough blockout to a fully textured and optimised asset; this process involves many steps and careful decisions along the way.
Now that you’ve seen the full journey – from initial reference to modelling, texture and final polish – I hope it gives you a bit of insight into what goes into creating our diner. Now, here’s where it gets exciting: the diner is being offered as a Kickstarter reward! This gives you the unique chance to name it and see your chosen name within Lawn Mowing Simulator 2. What would you call it? Would you name the diner after yourself – cementing your name in the project – or dedicate it to someone meaningful? The choice is yours, and it’s a rare opportunity to give the diner a name that carries real meaning. Click the link to check out this reward – https://tinyurl.com/2n9sxxs9